0

Master Your Game: Essential Disc Golf Putting Tips
Perfecting your disc golf putt starts with choosing the right disc. The difference might shock you. A disc with a durometer rating between 65 and 75 can completely change your consistency and control on the course. Most people think the driver is the key to low scores, but real disc golfers know that mastering your putter will actually decide your game.
Table of Contents
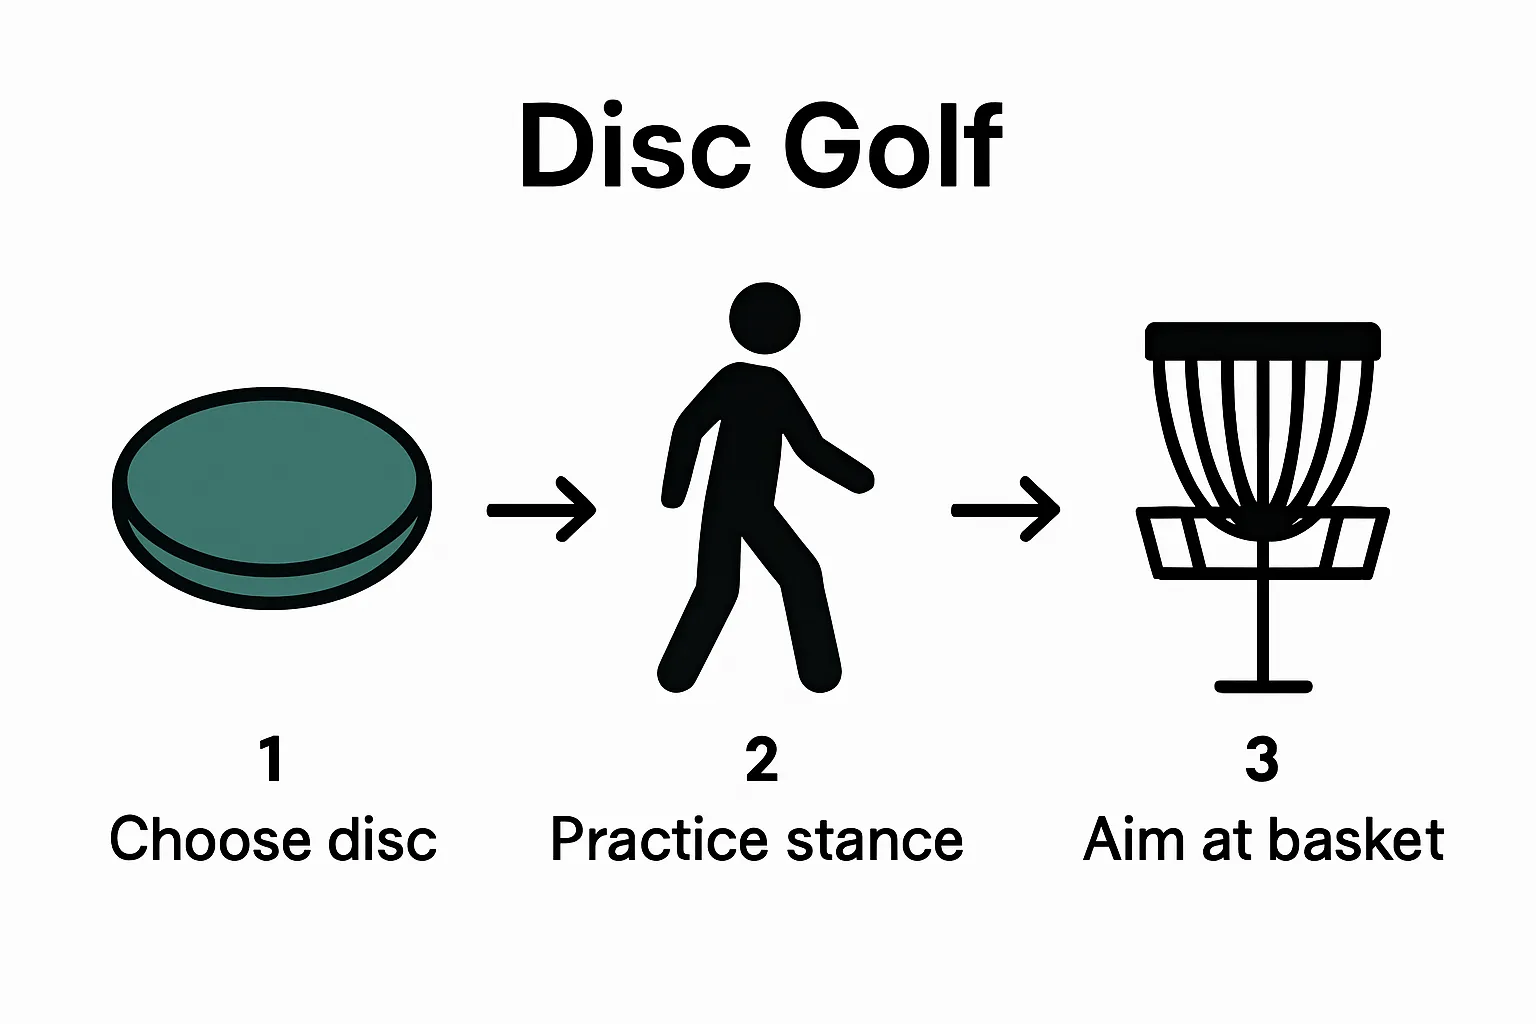
- Step 1: Choose The Right Disc For Putting
- Step 2: Establish A Consistent Stance And Grip
- Step 3: Focus On Your Aim And Line Of Sight
- Step 4: Execute A Smooth Putting Motion
- Step 5: Practice Regularly And Measure Your Improvement
Quick Summary
| Key Point | Explanation |
|---|---|
| 1. Choose a comfortable putting disc | Find a putter that feels good in your hand for better accuracy and consistency. |
| 2. Establish a consistent stance | Develop a stable, staggered stance for better balance and controlled putting motions. |
| 3. Focus on aim and line of sight | Maintain a steady gaze on the target to enhance your throwing accuracy. |
| 4. Execute a smooth throwing motion | Create a pendulum-like motion for improved fluidity and precision in your putts. |
| 5. Practice regularly and track progress | Establish a practice routine and log your success to see improvements over time. |
Step 1: Choose the Right Disc for Putting
Choosing the right disc for putting is fundamental to mastering your disc golf game. Putters are specialized discs designed specifically for short-range accuracy and controlled throws near the basket. Unlike drivers or midrange discs, putters have a more blunt edge, slower speed, and greater stability that allows for precise placement and minimal fade.
When selecting your putting disc, focus on finding a model that feels comfortable in your hand and provides consistent release. Grip is crucial because a disc that feels natural will help you develop muscle memory and improve your accuracy. Most disc golfers prefer putters with a deep rim and slightly rounded profile that allows for a secure, confident grip. Learn more about selecting the perfect putt and approach disc to refine your technique.
Beginners should start with a neutral-stability putter that doesn’t have extreme left or right movement after release. Look for discs with a durometer (plastic hardness) rating between 65-75, which provides a good balance between flexibility and control. Experienced players often carry multiple putters with slightly different characteristics to handle various wind conditions and course layouts.
To determine the right putter, visit a local disc golf store or borrow discs from experienced players. Practice putting with several models to understand how each disc performs. Pay attention to how the disc feels during release, its trajectory, and how consistently it reaches the basket. Your perfect putting disc will feel like a natural extension of your throwing arm.
Key considerations when choosing a putting disc:
- Comfortable grip and hand feel
- Neutral stability for consistent flight
- Appropriate plastic type for your playing conditions
- Weight between 165-175 grams for most players
Remember that finding your ideal putter is a personal journey. What works perfectly for one player might not suit another. Patience, practice, and willingness to experiment will help you discover the putting disc that elevates your disc golf performance.
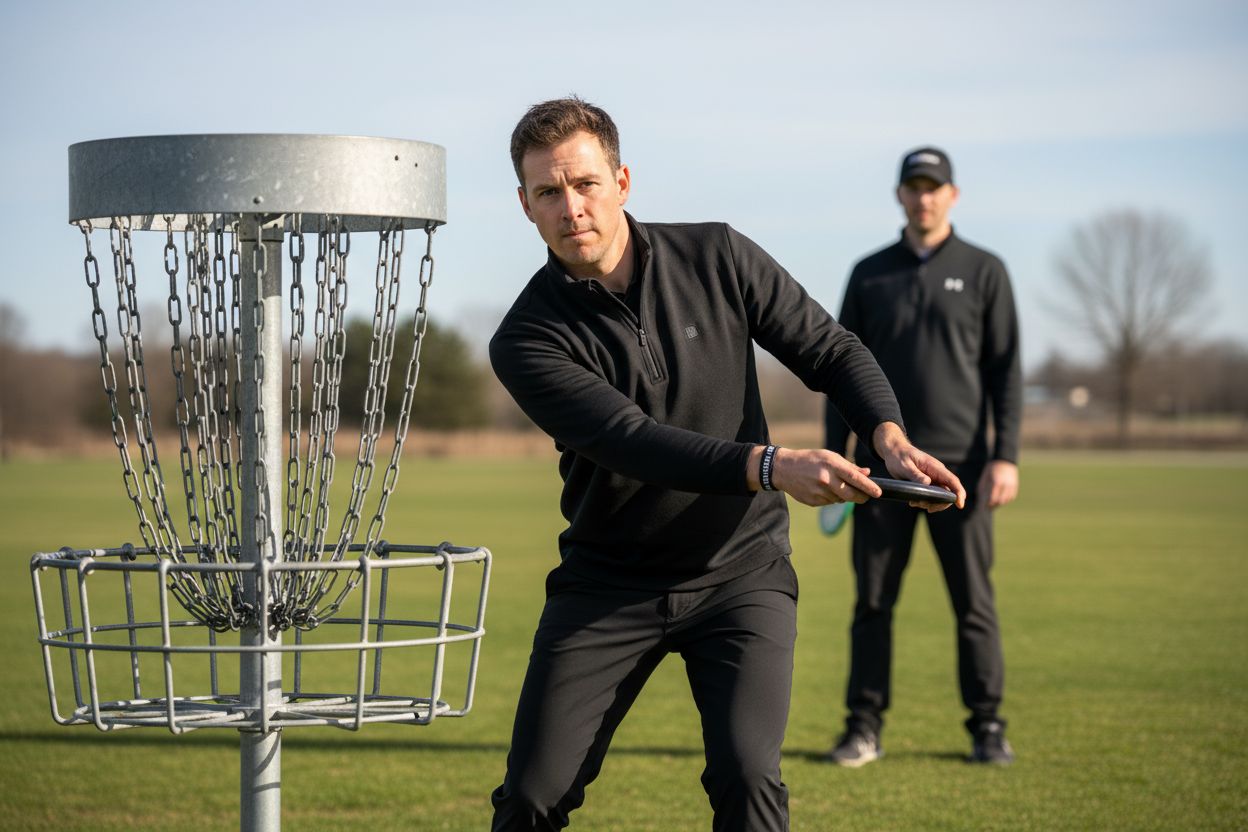
Step 2: Establish a Consistent Stance and Grip
A reliable putting technique starts with establishing a consistent stance and grip that provides stability, balance, and control. Your body position and how you hold the disc are critical components that directly impact your throwing accuracy and overall performance. Learn more about essential beginner disc golf techniques to develop a solid foundation.
Stance fundamentals begin with foot positioning. Most successful disc golfers adopt a staggered stance, where one foot is slightly forward of the other, creating a stable base that allows for smooth weight transfer during the putting motion. Your forward foot should point toward the basket, while your back foot provides balance and support. Keep your knees slightly bent to absorb movement and maintain flexibility.
Grip technique is equally important and varies based on personal comfort and hand size. The most common putting grips are the power grip, fan grip, and stack grip. For beginners, the fan grip works exceptionally well because it offers maximum control and a consistent release. To execute a fan grip, spread your putting hand’s fingers across the disc’s flight plate, creating a wide, stable contact point. Your thumb should rest on top of the disc, providing additional control and guidance.
Body alignment plays a crucial role in putting accuracy.
Position your shoulders parallel to the target line, with your body facing slightly sideways. This position allows for a more natural, pendulum-like throwing motion that increases consistency and reduces unnecessary body movement. Keep your upper body relaxed but engaged, allowing your arm to move smoothly through the throwing motion.
Key elements of a solid putting stance:
- Staggered foot position with slight knee bend
- Shoulders aligned with target line
- Relaxed but controlled upper body
- Consistent grip technique
- Smooth weight transfer during throw
Practice your stance and grip repeatedly to build muscle memory. Start by performing slow, controlled putting motions without releasing the disc. This helps you understand proper body mechanics and develop a repeatable technique. As you become more comfortable, gradually increase your throwing speed while maintaining the fundamental principles of balance, alignment, and control.
Here is a quick-reference checklist table to help you verify key elements for a consistent and effective putting stance during practice sessions.
| Checklist Item | What to Look For | Why It Matters |
|---|---|---|
| Staggered Foot Position | Forward foot points toward basket | Provides stability and alignment |
| Slight Knee Bend | Knees flexed, not locked | Absorbs movement |
| Shoulders Aligned with Target Line | Shoulders parallel to line of aim | Increases throwing accuracy |
| Relaxed but Controlled Upper Body | No tension in upper torso | Smoother putting motion |
| Consistent Grip | Same grip each putt | Improves release consistency |
Remember that developing a consistent stance and grip takes time and patience. Every player’s body is different, so experiment with subtle variations until you find a technique that feels natural and produces reliable results. Watch professional disc golfers, record your own putting sessions, and be willing to make incremental adjustments to your technique.
Below is a comparison table of the most common disc golf putting grip techniques, summarizing their features and the primary advantages for players.
| Grip Technique | Key Features | Primary Advantage |
|---|---|---|
| Power Grip | Fingers tucked under rim, thumb on top | Maximum power, less control |
| Fan Grip | Fingers fanned across flight plate, thumb on top | Best control and release accuracy |
| Stack Grip | Fingers stacked and pressed together under rim | Enhanced stability, secure feel |
Step 3: Focus on Your Aim and Line of Sight
Mastering your aim and line of sight is a critical component of successful disc golf putting that transforms average players into consistent performers. Visualization is your most powerful tool in developing accurate putting skills. Before each throw, mentally map the trajectory from your current position directly through the basket’s center chains. Explore advanced techniques for optimal disc golf performance to enhance your strategic approach.
Your head position and eye alignment determine the accuracy of your putt. Keep your head still and level, with your eyes focused directly on the target. Many beginners make the mistake of moving their head during the throw or looking away prematurely. Maintain a fixed gaze on the basket’s center throughout your entire putting motion. This steady visual reference helps your body automatically align and adjust the disc’s release point.
Develop a consistent pre-throw routine that includes precise aiming techniques. Stand approximately 10-15 feet from the basket when practicing, which allows you to build muscle memory without overwhelming complexity. Align your body so that an imaginary line runs from your throwing shoulder through the basket’s center. Some players find it helpful to use the basket’s chains as a precise aiming point, focusing on throwing directly through the middle of the chain cluster.
Wind and terrain can significantly impact your putting line. Learn to read environmental conditions and adjust your aim accordingly. On windy days, aim slightly upwind or compensate for potential disc movement. Uneven ground requires subtle body adjustments to maintain a consistent throwing angle. Practice reading these variables by putting in diverse course conditions.
Key considerations for aim and line of sight:
- Maintain a fixed head position
- Keep eyes locked on basket center
- Develop a consistent pre-throw routine
- Adjust for wind and terrain variations
- Practice visualization techniques
Verify your aim by recording your putting sessions and analyzing your throws. Look for consistent release points, disc flight patterns, and overall accuracy. Pay attention to whether your misses follow predictable trajectories, which can help you make precise adjustments to your technique.
Remember that aim is a skill developed through patient, deliberate practice. Start with shorter distances and gradually increase your putting range as your accuracy improves. Embrace each throw as an opportunity to refine your technique, understanding that mastery comes from consistent, mindful repetition.
Step 4: Execute a Smooth Putting Motion
Executing a smooth putting motion transforms technical knowledge into consistent performance. The ideal putting motion mimics a pendulum – fluid, controlled, and repeatable. Your goal is to create a throwing action that minimizes unnecessary movement and maximizes accuracy. Discover advanced beginner disc golf techniques to refine your overall approach.
Focus on developing a pendulum-like throwing motion where your arm becomes an extension of your body. Start with your elbow slightly bent and close to your torso, creating a natural pivot point. As you prepare to throw, your arm should move in a straight, vertical plane, similar to a grandfather clock’s pendulum. The key is maintaining a consistent release point with minimal wrist manipulation. Your wrist should remain relatively locked, allowing your shoulder and arm to generate the throwing power.
Weight transfer plays a crucial role in creating a smooth putting motion. Begin with your weight slightly forward on your front foot, then gradually shift your weight through the throwing motion. This subtle movement helps generate consistent power without introducing unnecessary body rotation. Imagine your entire upper body moving as a single, connected unit. Your shoulders should remain level, and your head should stay perfectly still throughout the throwing sequence.
Breath control and mental rhythm contribute significantly to a smooth putting motion. Many advanced players develop a consistent breathing pattern that helps them maintain focus and timing. Take a deep breath before your throw, exhaling slowly as you release the disc. This technique helps reduce muscle tension and promotes a more relaxed, fluid motion.
Key elements of a smooth putting motion:
- Pendulum-like arm movement
- Minimal wrist manipulation
- Consistent weight transfer
- Controlled breathing
- Stable upper body positioning
Practice your putting motion without a disc initially. Stand in your standard putting stance and perform the throwing motion slowly, focusing on the smoothness of your movement. Use a mirror or record yourself to analyze your technique. Look for any unnecessary movements or wobbles that might disrupt your throwing consistency.
Remember that developing a smooth putting motion takes time and deliberate practice. Start with shorter distances and gradually increase your range as you build confidence. Pay attention to how your body feels during the throw – a truly smooth motion should feel effortless and natural.
 Embrace small improvements, understanding that mastery comes from patient, consistent repetition of fundamental techniques.
Step 5: Practice Regularly and Measure Your Improvement
Consistent practice transforms theoretical knowledge into genuine skill, and disc golf putting is no exception. Deliberate, structured practice is the cornerstone of improvement. Develop a routine that challenges your current abilities while maintaining an enjoyable learning environment. Learn more about optimizing your disc golf performance to enhance your training approach.
Establish a dedicated practice regimen that includes structured putting drills. Create a home practice area with a portable basket or target, allowing you to practice daily without traveling to a course. Start with shorter distances around 10-15 feet, focusing on consistency and technique before gradually expanding your range. Aim to complete at least 100 practice putts per week, breaking these sessions into manageable segments of 25-30 putts to maintain focus and prevent fatigue.
Measuring improvement requires systematic tracking of your performance. Keep a detailed practice log that records your putting accuracy, noting the number of successful throws at various distances. Use a simple grid system where you mark successful and missed putts, allowing you to visualize your progress over time. Some players find it helpful to use a digital spreadsheet or dedicated disc golf practice tracking app to monitor their development objectively.
Introduce variability into your practice sessions to simulate real-course conditions. Practice putting from different angles, with obstacles, and under varying wind conditions. Simulate tournament-like pressure by setting personal challenges, such as requiring a minimum number of consecutive successful putts or creating consequence-based practice games that maintain your mental engagement.
Key practice strategies for improvement:
- Maintain a consistent weekly practice schedule
- Track putting accuracy systematically
- Practice at multiple distances and angles
- Introduce realistic course simulations
- Set progressive skill development goals
Utilize video recording as a powerful improvement tool. Record your putting sessions from multiple angles, allowing you to analyze your technique critically. Compare your recordings over weeks and months to identify subtle improvements in your stance, grip, and throwing motion. Many disc golfers discover significant technique refinements by carefully reviewing their own footage.
Remember that improvement is a journey of patience and persistence. Some days will feel more challenging than others, but maintaining a positive, growth-oriented mindset is crucial. Celebrate small victories, learn from missed putts, and remain committed to your long-term development. Consistent, mindful practice will gradually transform your putting skills, turning challenging shots into reliable, repeatable successes.
Ready to Perfect Your Disc Golf Putting?
Struggling to find a putter that truly fits your hand or to develop a putting routine that delivers consistent results? You are not alone. Many disc golfers feel frustrated by missed short-range putts and inconsistent releases even after learning the fundamentals of stance and motion. The difference between a missed shot and a clutch putt often comes down to having the right disc and reliable equipment tailored to your technique and goals.

Your practice only gets better with the best tools in hand. Now is the time to transform your skills using quality discs and supportive gear from a trusted online source. Visit golfdiscs.com for a range of proven putters and equipment designed specifically for players focused on improving accuracy and consistency. Not sure which disc matches your new technique? Explore our expert advice and exclusive selection to take your putting from average to unstoppable. Start with our guide to choosing your next disc golf disc or find specialized putt and approach discs here. Upgrade now and give your game the confidence boost it deserves.
Frequently Asked Questions
What type of putter should beginners use?
Beginners should start with a neutral-stability putter that doesn’t have extreme left or right movement after release. Look for a putter with a durometer rating between 65-75 for a balance of flexibility and control.
How can I establish a consistent putting stance?
To establish a consistent stance, adopt a staggered foot position with your forward foot pointing toward the basket. Keep your knees slightly bent for balance and ensure your shoulders are aligned with the target line for improved accuracy.
What is the importance of visualization in disc golf putting?
Visualization helps players mentally map the trajectory from their position to the basket. Keeping a steady gaze on the target allows the body to align automatically and can improve overall throwing accuracy.
How often should I practice my putting skills?
Aim to practice at least 100 putts per week, breaking sessions into manageable segments. Consistent practice helps develop muscle memory and improves accuracy over time.