0

How to Throw Backhand: Master Your Disc Golf Technique
Mastering the disc golf backhand throw can feel impossible when you first pick up a disc. Most beginners are surprised to learn that throwing form—down to your foot position or even your grip—impacts your results more than raw arm strength does. Yet, focusing on small fundamentals is what sets apart casual throwers from players who can launch a disc over 250 feet with control and consistency.
Table of Contents
- Step 1: Gather Your Equipment And Space
- Step 2: Assume The Correct Stance
- Step 3: Grip The Disc Properly
- Step 4: Execute The Throw Motion
- Step 5: Follow Through And Observe
- Step 6: Practice And Refine Your Technique
Quick Summary
| Key Point | Explanation |
|---|---|
| 1. Select suitable discs for practice | Use 3 to 4 understable discs with a speed rating of 6 to 9 for effective learning. |
| 2. Maintain a proper throwing stance | Position feet shoulder-width apart for stability and allow hip rotation for power. |
| 3. Grip the disc securely | Use a power grip with four fingers under the rim to maximize control and spin. |
| 4. Focus on fluid throw motion | Initiate with a reach back and smooth weight transfer for effective energy conversion. |
| 5. Incorporate follow-through for feedback | Allow your arm to extend fully post-release, assessing disc flight for technique adjustments. |
Step 1: Gather Your Equipment and Space
Successful backhand throws in disc golf start with proper equipment selection and understanding your practice environment. Before you begin perfecting your technique, you need to gather the right tools and secure an appropriate space that allows safe and unrestricted movement.
First, select 3 to 4 discs suitable for backhand throws. Beginners should prioritize understable discs with lower speed ratings between 6 to 9, which provide more forgiveness during the learning process. Look for midrange and fairway drivers that have slightly less stability, making them more responsive to your developing throwing mechanics. A recommended starter set might include a neutral midrange disc, an understable fairway driver, and potentially a stable distance driver to practice different throwing angles.
Your practice space requires careful consideration. You will need an open area with minimal obstacles such as a large park, an empty sports field, or a dedicated disc golf practice area. The space should offer at least 100 feet of unobstructed throwing distance, allowing you to execute full throwing motions without risk of hitting trees, buildings, or people. University of Oregon’s Physical Education Laboratory recommends ensuring enough room for safe throwing and catching, which is crucial for developing proper technique.
Additional essential equipment includes comfortable athletic shoes with good traction, flexible clothing that allows unrestricted movement, and optional items like a towel to keep your discs dry and clean. Remember that consistent practice in a controlled environment will help you develop muscle memory and refine your backhand throwing technique more effectively than sporadic, interrupted sessions.
Here is a table summarizing the essential equipment and practice space requirements for mastering the disc golf backhand throw. Use this as a quick reference before you begin a practice session.
| Equipment/Resource | Specifications or Type | Purpose/Key Notes |
|---|---|---|
| Discs | 3 to 4 understable discs, speed 6-9 | Makes learning easier and more forgiving |
| Disc Types | Neutral midrange, understable fairway, stable distance driver | Offers a variety of throwing angles and styles |
| Practice Space | Open field, 100+ feet unobstructed | Ensures safety and allows full throwing motion |
| Athletic Shoes | With good traction | Provides stability during throwing |
| Athletic Clothing | Flexible, non-restrictive | Allows free range of motion |
| Towel (optional) | Absorbent and portable | Keeps discs dry and clean |
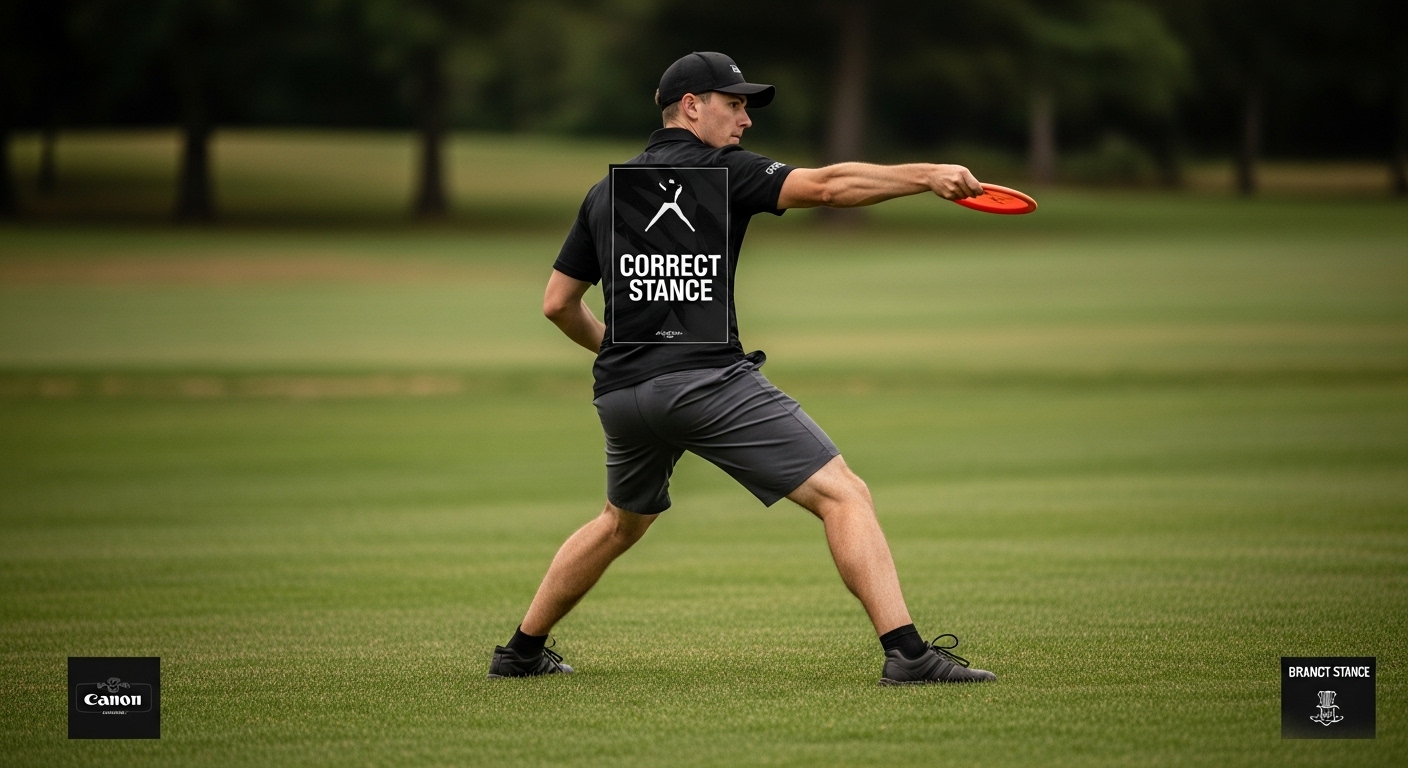
Step 2: Assume the Correct Stance
Your stance is the foundational platform from which every powerful backhand throw emerges. Proper positioning transforms your body into a dynamic throwing machine, maximizing power transfer and accuracy while minimizing injury risk.
Begin by positioning your feet shoulder-width apart, creating a stable base that allows smooth weight transfer during your throw. Your non-throwing side foot should point toward your target, while your throwing-side foot remains slightly angled. This positioning enables a natural hip rotation that generates substantial throwing power. Journal of Sports Sciences research confirms that an athletic ready stance significantly enhances power transfer and technique accuracy.
Your body should adopt a slightly crouched athletic position, with knees softly bent and weight distributed evenly. Imagine you are a coiled spring ready to release energy—your upper body slightly leaning forward, chest facing sideways relative to the target. This stance provides maximum rotational potential, allowing you to engage your entire kinetic chain from the ground up. Your shoulders should be relaxed but engaged, creating tension that will translate into disc velocity during release.
As you settle into this stance, focus on maintaining balance. Too much forward lean risks losing control, while standing too upright restricts your rotational movement. Practice finding the sweet spot where you feel stable yet ready to explode into motion.
 A good test is attempting to hold the position comfortably for several seconds without wobbling—this indicates you have found your optimal throwing stance. Remember that consistency in your setup leads to consistency in your throw, making this foundational step crucial for developing a reliable backhand technique.
Step 3: Grip the Disc Properly
The grip is your primary connection point with the disc, translating your body’s energy into a precise and powerful throw. Mastering the power grip will dramatically improve your backhand technique, providing control and consistency across different throwing distances.
Position your four fingers tightly under the disc’s rim, with your thumb placed on top to create a firm, secure hold. The middle and ring fingers should press firmly against the inner rim, creating maximum contact and control. Professional disc golfer insights from the PDGA emphasize that your grip angle can significantly influence the disc’s flight path. Experiment with slight variations to find the most comfortable and effective hand placement that allows you to generate maximum spin and control.
As you develop your technique, pay attention to the pressure points in your grip. Too loose, and the disc will slip during release; too tight, and you’ll restrict the natural snap of your throw. The sweet spot involves a relaxed but secure grip that allows your wrist and fingers to provide a smooth, fluid release. Some players prefer a modified two-finger or three-finger approach, so don’t be afraid to experiment and find what works best for your hand size and throwing style.
If you want to explore more about disc selection that complements your grip, check out our guide on putt and approach discs for additional insights.
A good grip test involves holding the disc at different angles and practicing your release motion without actually throwing. Your goal is to develop muscle memory where the disc feels like a natural extension of your hand. Consistency in grip leads to consistency in throw, making this seemingly simple step a critical foundation for developing a powerful and accurate backhand technique.
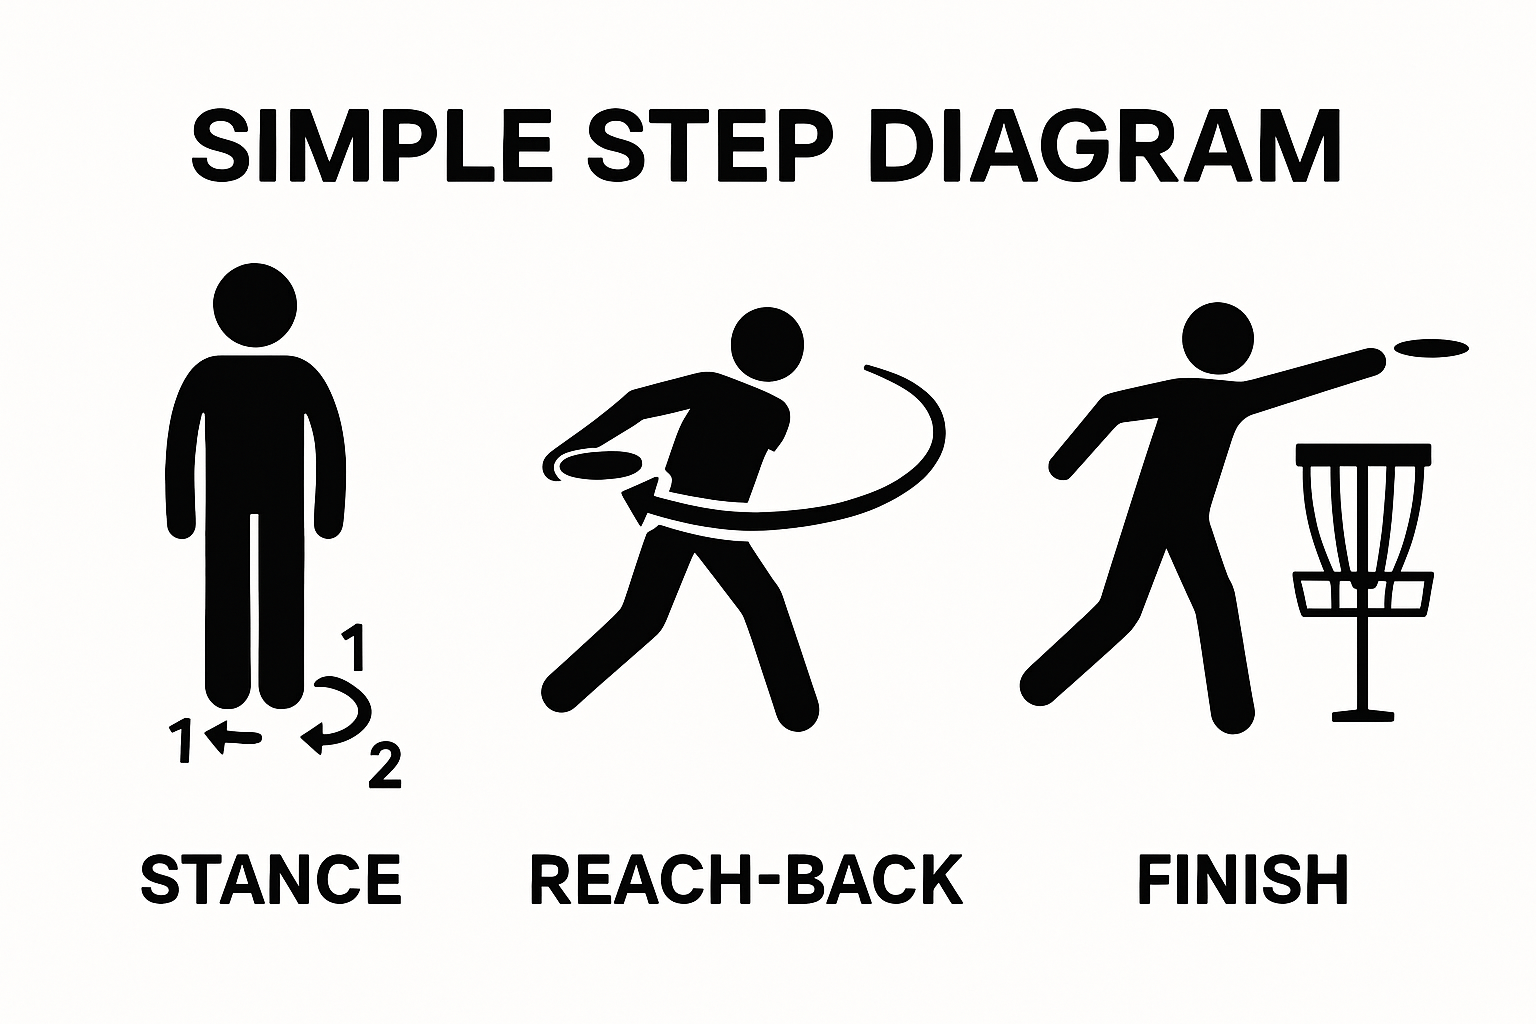
Step 4: Execute the Throw Motion
The throw motion transforms your carefully prepared stance and grip into a powerful disc trajectory. Successful backhand throws depend on fluid, coordinated body mechanics that generate momentum from the ground up through a series of synchronized movements.
Begin your throw by initiating a controlled reach back, keeping your arm relatively straight and moving directly away from your target. This initial movement creates potential energy and sets up the rotational power that will drive your disc. Oklahoma State University biomechanical research identifies this as a critical transition phase where your body prepares to convert potential energy into kinetic motion. As you reach back, your hips should start rotating slightly, creating torque that will amplify your throwing power.
The next critical phase involves weight transfer and hip rotation. As you begin pulling the disc forward, shift your weight from your back foot to your front foot in a smooth, explosive motion. Your hips will rotate faster than your upper body, creating a whip-like effect that transfers energy through your torso and into your throwing arm. Think of your body as a coiled spring—the faster and more smoothly you unwind, the more power you’ll generate. The release point is crucial: you want to release the disc when your arm is extended, with your wrist providing a final snap that imparts spin and precision to your throw.
Verify your technique by observing the disc’s flight. A clean backhand throw should feel effortless, with the disc traveling on a flat or slightly nose-down trajectory.
 If you find the disc turning over too quickly or failing to achieve desired distance, revisit your weight transfer and hip rotation mechanics. Consistent practice will help you develop muscle memory, transforming these technical movements into a natural, fluid motion that feels more like instinct than conscious effort.
Step 5: Follow Through and Observe
The follow-through is not merely the conclusion of your throw but a critical diagnostic moment that reveals the effectiveness of your entire throwing technique. Your body’s final position communicates volumes about the quality of your backhand throw, providing immediate feedback that can help you refine your mechanics.
As you release the disc, allow your throwing arm to continue its natural motion, extending fully beyond the release point. Your body should remain balanced, with weight distributed evenly between your feet. Research from the Journal of Sports Medicine emphasizes that a controlled follow-through reduces injury risk and enhances overall throwing performance. Your arm should finish pointing toward your target, with your chest facing forward and hips slightly rotated, creating a fluid, athletic completion to the throwing motion.
Observe the disc’s flight path carefully during this final phase. Pay attention to critical details: Does the disc travel on a flat trajectory? Is it turning over too quickly or fading earlier than expected? These observations are your most immediate tools for understanding and correcting your technique. A well-executed backhand throw will demonstrate a predictable, controlled flight that matches your intended line. Inconsistent flights often indicate specific mechanical issues—such as improper grip angle, uneven weight transfer, or premature arm rotation—that can be diagnosed and corrected through mindful practice. The goal is to develop muscle memory that produces consistent, repeatable throws, transforming technical mechanics into an intuitive, natural motion that feels effortless and precise.
Step 6: Practice and Refine Your Technique
Practice transforms mechanical instructions into intuitive skill, converting your understanding of backhand technique into muscle memory. Deliberate, structured practice is the bridge between knowing how to throw and consistently executing powerful throws.
Motor skill research from the Journal of Human Kinetics confirms that focused repetition with active feedback dramatically accelerates learning. Begin by establishing a consistent practice routine that includes targeted drills. Start with shorter distances—around 100 to 150 feet—where you can concentrate on maintaining proper form without overexerting yourself. Use a single disc and repeat your throw multiple times, focusing on one specific mechanical aspect during each set. For instance, dedicate one practice session to perfecting your reach back, another to hip rotation, and another to release point consistency.
Recording your practice sessions provides an invaluable tool for self-improvement. Use your smartphone to capture video from multiple angles, allowing you to compare your actual technique against the ideal form you’re learning. Look for subtle details: Are your hips rotating completely? Is your weight transfer smooth? Are you maintaining a consistent disc angle during release? Review these recordings critically but compassionately, understanding that technique refinement is a gradual process. Expect incremental improvements rather than overnight transformations. Some players find it helpful to set specific, measurable goals—such as achieving a consistent 250-foot throw or reducing release angle variations—which provide clear benchmarks for tracking your progress.
The following table provides a concise overview of each main step in the disc golf backhand technique, including primary focus and goal. Use it as a roadmap to track your progress through each phase.
| Step | Main Focus | Key Goal |
|---|---|---|
| 1. Gather Equipment & Space | Select right discs, safe area | Prepare for effective and uninterrupted practice |
| 2. Assume Correct Stance | Body and foot positioning | Build a solid foundation for power and accuracy |
| 3. Grip the Disc Properly | Power grip, finger placement | Maximize control and consistent spin |
| 4. Execute Throw Motion | Reach back, weight transfer, release | Harness energy for distance and precision |
| 5. Follow Through & Observe | Arm extension, feedback | Improve technique and ensure safe completion |
| 6. Practice & Refine Technique | Deliberate, goal-based repetition | Develop muscle memory and benchmark progress |
Take Your Backhand to the Next Level with the Right Disc Golf Gear
You have learned the foundational steps to master your backhand technique in disc golf, from selecting the right discs to perfecting your stance and throw. But if you are still struggling with consistency, power transfer, or finding that ‘sweet spot’ grip, the missing link could be the quality and fit of your equipment. Using the wrong disc can hold back your progress and keep you from building the muscle memory and control you worked hard to develop.

Why wait to break through your limitations? Discover hand-selected discs and proven equipment that match each stage of your backhand journey at golfdiscs.com. If you are curious about choosing the best tools for approach plays, explore our guide on what to consider when choosing a putt and approach disc. Upgrade your gear now and turn your practice into results. Your next great throw starts with the right support. Shop today and experience the difference.
Frequently Asked Questions
What discs are best for beginners learning backhand throws?
Beginner players should choose 3 to 4 understable discs with lower speed ratings between 6 to 9, such as a neutral midrange, an understable fairway driver, and potentially a stable distance driver.
How should I position my feet when throwing backhand?
Your feet should be shoulder-width apart, with your non-throwing side foot pointing toward the target and your throwing-side foot slightly angled. This positioning helps with weight transfer and power generation during the throw.
What grip should I use for an effective backhand throw?
The power grip is recommended. Position your four fingers underneath the disc’s rim with your thumb on top for a secure hold. Ensure your grip is firm but relaxed to allow for a smooth release.
Why is the follow-through important in a backhand throw?
The follow-through helps ensure balance and provides feedback on your throwing technique. A proper follow-through can improve your performance and reduce the risk of injury by encouraging a natural completion of the throw.